This recipe calls for white rice to be mixed with glutinous rice, resulting in a concoction with a softer bite that also does not give rise to a ‘bloated feeling’ after consumption – most welcomed by older folks who are prone to indigestion.
There are many variations to the recipe. You can also consider adding dried shrimp and garnish with pork/chicken floss before serving.
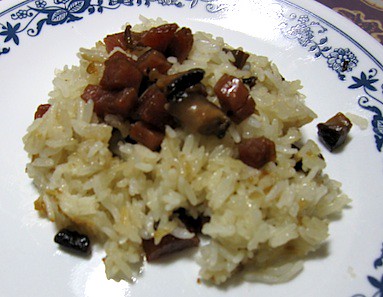
Chinese Glutinous Rice
Ingredients
1½ cups glutinous rice
½ cup white rice
3 Chinese sausages
8 dried mushrooms
½ yellow or white onion
2 stalks green onions
1 cup chicken broth or stock
1 tbsp rice wine
2 tsp soy sauce
1 tbsp oyster sauce
Method
1. Rinse the glutinous rice and soak it overnight in cold water. Do likewise for the dried mushrooms.
2. Chop the onion and green onion. Set the green onion aside in the fridge under a damp paper towel for garnish.
3. Remove the mushroom from the water but keep the soaking liquid. It will be used to cook the rice to infuse it with the mushroom flavor. Remove the mushroom stems and chop the mushrooms finely.
4. Slice the Chinese sausage into quarters lengthwise. Then chop those quarters into small pieces.
5. Heat a large frying pan or wok on medium-high until a drop of water sizzles. Combine the sausage, onion and mushrooms and place in the pan. Do not add extra oil because the sausage has plenty of fat to fry the mushrooms and onions. Add rice wine and stir-fry until the onions have turned golden brown, about 5 minutes. Add soy sauce and oyster sauce to the mixture. Be careful not to add too much, although at this point it will be excessively salty because it will also flavour the rice later. Stir fry till the onions have softened and that the sausage has browned nicely. Dish up the mixture and set aside.
6. Drain the rice and put into a medium to large pot with a lid. Pour in equal parts of the liquid used to soak the mushrooms and chicken broth. The liquid should just cover the rice. Cover the pot, keeping the lid to one side to let a small opening for steam to escape. Turn the heat to medium-low.
7. When the rice has absorbed some of the liquid, spoon the fried mixture over the rice. Do not stir or otherwise disturb the rice as it is will not be sufficiently cooked yet. Cover the pot and let it cook for an additional 10 minutes or so.
8. When the rice has finished cooking and absorbed all of the free-standing liquid, stir the rice to incorporate all the ingredients together. If necessary, add additional oyster sauce to taste.
9. Garnish with green onion and serve.
Reference : Destination Eats