

One day, out of the blue, my mother and I talked about how people make kaya. It seemed simple enough with only a few types of ingredients needed. I felt it would be an exciting and useful new recipe to try since our families enjoy kaya as a breakfast spread.
The amount of sugar that I have used is reduced as we prefer it to be less sweet but if you prefer yours a little sweeter, do add another ¼ - ½ cup more sugar.
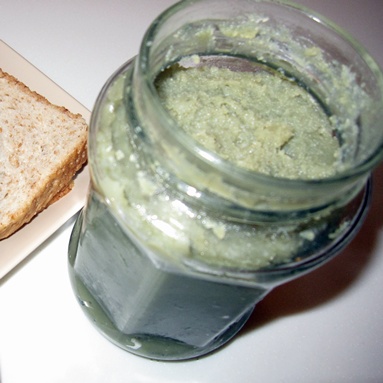
You may also use more pandan leaves if you like kaya of a deeper green colour, I used 12 more pieces to arrive at the colour in my picture. Alternatively, you can also pound or blend a portion of the pandan leaves and strain it for pandan juice which can then be added to the mixture before cooking.
One important point to note is that if you are going to cook it over the stove, ensure that the pot is not warm nor hot when you place the ingredients in it to mix. If the pot is hot, the eggs would cook immediately and you will end up with pandan-and-coconut-milk-flavoured scrambled eggs.
This is the first time I am using this recipe and one thing I learnt was to add a little more sugar water while blending so that the kaya remains moist enough for easy spreading even after storing in the refrigerator. I removed most of the water and I found it fragrant though a little thick.
Hubby loves it so I will definitely be making it again and maybe…just maybe, my family will bid goodbye to store-bought ones.
Nonya Kaya
Ingredients
1 cup coconut milk
1 cup eggs
1 cup sugar
10-15 pieces of pandan leaves, washed and wiped dry
(This recipe makes roughly about 1½ cups of kaya)
Method
1. Wash, dry and tie up bundles of about 5 pandan leaves in each bundle.
2. Measure out eggs, then beat lightly till egg yolk and whites are mixed.
3. Put all ingredients into pot. Turn heat on at small and cook for about 1 hour, stirring continuously. The kaya mixture may look like a lumpy or curd-like substance.
4. Turn off heat and let mixture cool for a while. Remove all pandan leaves then put into a blender. There may be quite a bit of water (this is just sugar water) and if so, drain out some of this water. Blend lightly till smooth. Add more sugar water if kaya is too thick while blending.
5. Pour into jars and let cool before storing in refrigerator.
Reference : If she can do it, so can you


2 comments:
Hi there - Just to let you know I tried your recipe and it turned out beautifully!
Applying the 1:1:1 ratios for eggs, coconut milk and sugar in your recipe, I used a 270ml tin of coconut cream, used the same tin to measure as many eggs as it would whole (6), and then again for raw caster sugar, which I thought would give a nicer flavour than plain white caster sugar. I did reduce the amiunt of sugar by a fifth (tin was only 4/5 full) as I don't like it too sweet. I added a tiny bit of pandan flavour (not having access to fresh pandan in Perth), then stirred the mixture for about 2 hours in a double boiler until it thickened and lifted the sides and bottom of the pan. It came out lovely and was worth the trouble. It was slightly lumpy because I probably didn't stir it well enough. But I like it thick and with a bit of texture so that was wonderful. I think this recipe is a keeper - it's really simple and certainly the best one I've tried so far on-line. It's up there with my grandmother's firm nonya kaya recipe.
So thank you very much and keep up your great work on your blog. Kind reagrds, Nat Sandygroper.
Hi Nat,
Thanks for your kind feedback and encouragement. Glad you found the recipe useful and I hope your family enjoyed the kaya :)
Yes I like mine slightly lumpy too for a less-processed kind of feel on the tongue. But should you find it a tad too lumpy, you can try blending it slightly to get a smoother texture.
Post a Comment